Saturday, August 18, 2012

You're not my friend if you don't like cake - or at least my cake

Creating new recipes is all well and good, but sometimes you need an old standby.  I've been using basically the same recipe for chocolate cake for about three years now, with some slight alterations when necessary.  It is a dark chocolate cake and it is moist, delicate, and flavorful - pretty much perfect.  I know what many of you will say - "But Danielle, chocolate cake is so easy to make, why are you patting yourself on the back for this cake?" Well, it is because my chocolate cake is simply the best chocolate cake.  I have so much confidence in this cake that I made 50 (out of 180) cupcakes for a friend's wedding with this recipe.

Now, to take a step back towards reality and take a humility pill, the reason the cake is so good is because I have such a good base to work from.  I found this recipe on Allrecipes a few years ago and I haven't changed it too much since then, mostly just tweaking the directions a little bit and adding some different flavorings: Dark Chocolate Cake I

Don't you just want to eat it?
 
For this recipe, the Dark Chocolate Cream Cheese Strawberry Cake, I followed these steps: 

Dark Chocolate Cake
  • 2 cups of boiling water
  • 1 cup of unsweetened cocoa powder
  • 1 tsp of  coffee extract
  • 2 3/4 cups of all-purpose flour
  • 2 tsp of baking soda
  • 1/2 tsp of baking powder
  • 1/2 tsp of salt
  • 1 cup of butter, softened
  • 2 1/4 cups of white sugar
  • 4 eggs, separated
  • 1 1/2 tsp of vanilla extract
Tip: I know most recipes call for unsalted butter, but I like to laugh in the face of convention - or maybe I just really like salt - so I tend to use salted butter in my cakes and they turn out wonderful every time!
You're going to need four bowls for this recipe - one for the chocolate, one for the egg whites, one for the dry ingredients, and one for the wet.  The first and smallest bowl is for the chocolate.  Pour the two cups of boiling water over top of the cocoa powder and whisk this until the chocolate is completely blended into the water.  How I altered the Allrecipes version was by adding the coffee extract to the chocolate.  I really feel like it adds an extra subtle dimension to the chocolate flavor.
After you've mixed the chocolate, mix together your wet ingredients.  I will readily admit that occasionally I cannot wait until my butter is soft and will have to microwave it, but I advise against this as melted butter can definitely change the texture of your cake.  So, beat together your softened butter and sugar until it is a delicious paste.  Now add your egg yolks.  You should put the egg whites into bowl that will be big enough to beat the whites later.  Beat in the yolks and the vanilla to the sugar and butter.
 Now you can mix the dry ingredients.  I am the first one to admit that I am a lazy cook sometimes, so I will often not mix the dry ingredients together first in a separate bowl.  If I do it that way, I'll mix in the salt, baking soda, and baking powder into the sugar/butter first and make sure it is well blended.  If I mix the flour separately, then I just mix the flour, salt, and baking powder and soda in the bowl and whisk them together.
Then the chocolate and the flour can be added in about three stages - be careful during the chocolate half of the stage because if you are using an electric mixer, it may make a little bit of a mess.  After you have mixed in all the flour and all the chocolate, you should have a delicious batter, but you aren't finished yet!
You still have to deal with those egg whites!  The egg whites should be beaten until they are at least frothy, but you could beat them until they are approaching the stiff peak stage.  This is going to make your batter and your cake much fluffier and lighter - this is something I find really necessary for pound cakes, but I think it does something lovely for all cakes.  This mixture should be folded into the batter, not whisked or beaten as that would destroy all the wonderful bubbles!
I poured this into three 9 inch pans (that I buttered and floured) and tried to make it as even as possible.  These are then baked for about 18-20 minutes in a 350 degree oven.  Something really important to remember is that you don't want to overcook any cake since it will immediately make it less delicious.
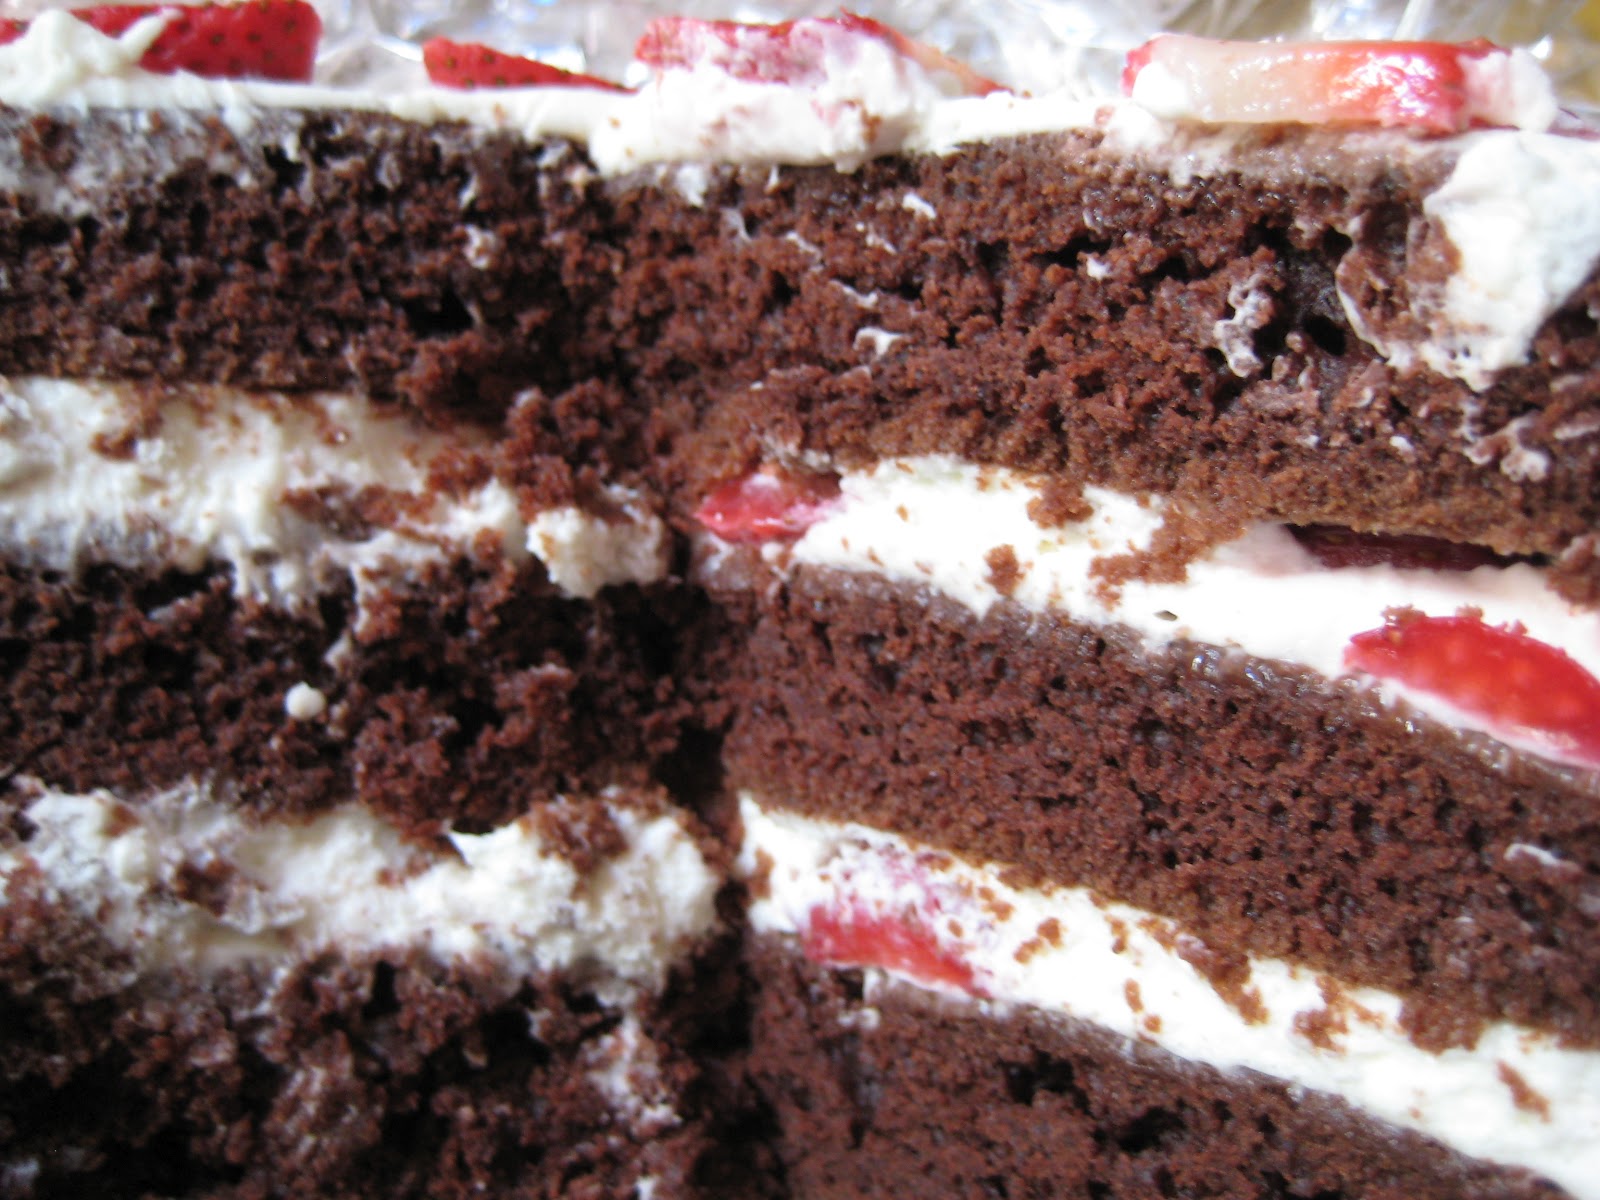
Three layers of chocolate goodness!
 
Since the finished cake is really only as good as what you put on the cake, I've started using this absolutely delicious recipe for Sturdy Whipped Cream Frosting that my awesome sister found on Allrecipes as well.  It really does hold its shape remarkably well and it tastes amazing!  The cream cheese adds a dimension that you don't get from heavy cream alone.

As you can see above, I layered the frosting with slices of strawberries.  I suggest patting the strawberries dry a bit so that you don't have too much moisture inside the cake.  I didn't have quite enough frosting to cover the whole cake and make it look "perfect", but the rustic, homemade look is impressive enough for most people.

We got to share this cake with our new roommate, his partner, and his parents last night.  There were happy bellies all around and no complaints, so I'm pretty sure that I'm going to like them.  The next test might be a Lemon Pound Cake.  I wonder if I should warn him that we can't be friends if he doesn't like cake... 

Now in honor of Julia Child (as I sit here watching a Julia Child marathon on PBS), Bon Appétit!

Friday, August 17, 2012

New House, New Food

Moving is an exhausting experience.  I'm not just referring to the actual moving of furniture and boxes piled high with your most prized possessions, I mean the entire process.  I think the worst part of moving is the few weeks before moving out and after moving in when all the kitchen gadgets are packed away in boxes.  During this time there is always a moment when you want to make something interesting for dinner, you go to find that absolutely essential gadget... and it's already in a box.

HOWEVER, that really just makes the moment when you are finished moving and can start making real food again all that much sweeter.  My partner, Harry, and I recently moved to Richmond, Virginia and we'd been suffering with an incomplete kitchen for quite a while.  After finally managing to find room for the myriad of pots, pans, and processors, we were ready for some high class cuisine - or at least something that didn't come directly out of a microwave.

Tonight's dinner was developed in stages.  This afternoon, while waiting for a cake to finish in the oven (more about that later), I whipped together some hummus from basic canned garbanzo beans.  If I had to guess the recipe was something like this:

Zesty Thai Hummus
  • 1 (10 oz.) can of garbanzo beans
  • 1-1.5 tsp of Thai green curry paste
  • 15-20 large mint leaves
  • 1/4 tsp of lime zest
  • 1 tbsp of lemon juice
  • 2 tbsp of olive oil
  • salt and pepper to taste
Tip: Every time that I need to use limes or lime juice for something, I zest the lime even if the recipe doesn't call for lime zest.  All of that tasty zest can be put in a little jar and frozen, keeping it nearly as good as new for quite a long time and you'll always have some zest on hand for delicious hummus like this!

All you have to do is put all of these things together in a food processor and voilà, hummus!  I had no idea what I was going to do with this hummus, but I knew I wanted to eat it for dinner.

As the day went on and I kept working on the cake, I thought about how I could use the hummus without just spreading it on a tortilla and calling it a day.  As I reached in to the fridge to grab the strawberries for the cake, I saw some Mucho Nacho Peppers we got in Texas from Harry's parents.

Teaser for more cake to come!
 Now, these peppers are really very pretty.  As they are ripening, they develop from a typical jalapeño green into a deep red.  With these peppers as inspiration, I developed this recipe while I frosted that delicious cake.

Baked Hummus Mucho Nacho/Jalapeño Poppers
  •  6-10 peppers, halved and seeded (make sure they are fairly dry as well)
  • 3/4 cup of hummus (really any kind will probably do, but I obviously used the Zesty Thai Hummus)
  • 3 oz of cream cheese, softened
  • 1/3 cup of shredded cheese (I used a "Mexican" blend)
  • 2 eggs
  • Bread crumbs
 Tip: How much hummus and cheese you will need is really dependent on how big the peppers are, as well as how many there are, so try to plan according to size.  This recipe would probably work best for 10 medium sized peppers, thus making 20 poppers.

The reason why I liked this recipe so much was that it enabled me to add some protein to our dinner without defrosting any chicken - there are about 15 grams of protein in 1 cup of garbanzo beans!  For some reason, I was too lazy to defrost chicken, but not too lazy to make both hummus and poppers - go figure.

Now, to construct the poppers, take your seeded peppers and place a nice, big, rounded mound of the hummus/cheese mixture into the hollow.  After you do this for each pepper half, place them in the freezer for about 15-20 minutes.  This hardens the hummus/cheese mixture enough that this next step is easy.  While the poppers freeze, beat your eggs in a bowl and pour out some bread crumbs onto a plate.  When they are ready, dip the poppers into the egg mixture, then roll in the bread crumbs.  I like to place them, pepper side down, on the bread crumbs, then sprinkle crumbs on the top - it seems more efficient.

Finally, bake them at 375 degrees for about 15-20 minutes.  You should keep an eye on them since they tend to bubble out of their bread crumb shells - but even if they do bubble out, they are delicious and you can just put the escaping hummus/cheese back on top of the popper.

When they are finished, they should be crispy and golden, like this:

You can see some of the bubbled hummus/cheese, but we didn't care, it was too tasty to worry about!
We ate these delicious and moderately healthy (don't forget all the protein and that they aren't fried!) treats with some tasty spaghetti and diced tomatoes.  All in all, I am quite satisfied with this foray into our new kitchen and I'm looking forward to many more.

Now, denizens of the internet, it is time for me to go to bed, which means you will have to wait to hear about that delicious chocolate cake on a different day - but believe me, it's worth it!